Making A Doll Clothes Closet with Dollar Store Items (Perfect For American Girl Dolls)!
This post may contain affiliate links and I may be compensated for this post. Please read our disclosure policy here.
My girls have been asking for a doll clothes closet for their doll items for quite awhile. One has an American Girl Doll, and the other has two different 18 inch dolls, so between the three dolls they have started to accumulate many items. I noticed they were not using them much though, and figured that must be because I had them all thrown in a pile in a basket.
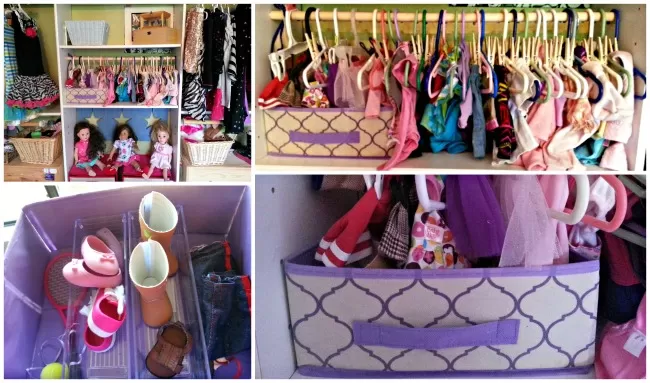
The only thing was, everywhere I looked, the doll closets were pricey. Then there was the issue of space. Where do I put a doll closet, in their already packed room. So, we decided to head to the dollar store, and convert one shelf in their closet into a doll closet. If you are looking for American Girl doll furniture, this is a great budget friendly option! American Girl furniture can cost you over $100, so $7 for a closet was the perfect alternative for us.
We used an existing closet shelf, but if you did not have something like this existing already you could either buy a cheap small bookshelf, or take a drawer out of a dresser and convert that space into a closet like this. We spent $7 to make the closet you see above. It might be more or less for you, depending on what items you have on hand. If you needed to add in a cheap bookcase, you could still make one for less then $20, which is likely still much cheaper then you can buy a doll closet for.
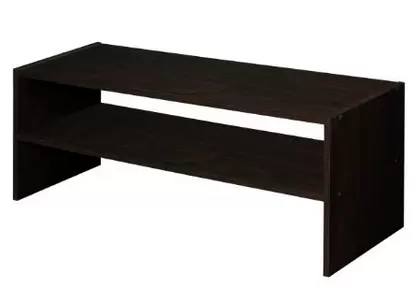
If you don’t have an existing closet space, something like this shelf organizer on Amazon could work (just add the dowel, rather then the middle shelf). It’s only $12.95, so it would be an affordable option.
Supplies you will need (we got most of these at our local dollar store):
- Space to make the closet (a shelf from a bookshelf, or part of a dresser, etc)
- Wooden Dowel the length of your shelf space (we got one at the dollar store, and cut it down to size. You can also find these at JoAnnes and Michaels, but they may be cheapest at Home Depot if you don’t have them at your dollar store).
- Kid size Hangers (we had a ton of these on hand, so we used our own, but they had packs at the dollar store too)
- 1 package of Clothes pins (we found a large pack of the wooden ones for $1 at the dollar store)
- Hot Glue Gun
- Two Screws or Nails (to attach Dowel)
- Canvas Bin to hold small items like shoes (we also found ours at the dollar store)
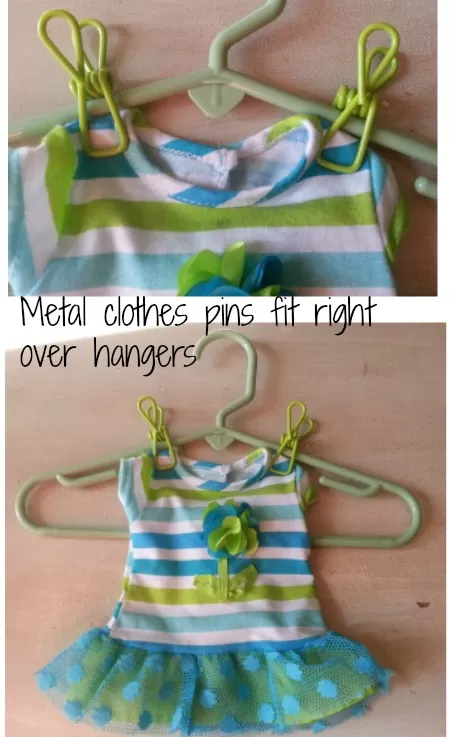
We also found these colored metal pins at the dollar store. The plus to using them is that you will not need a glue gun, they will fit right over the hanger and still clip the clothes. The downside, is that you will need more packages (it would take about 6 to put together a closet the size of the one above). So, depending on whether you have a glue gun already, it may cost you less or more to use these).
How to Make the Hangers with Wooden Clothes Pins:
If you want to keep it really simple you can buy doll hangers. We found this 10 pack for $7.95 on Amazon. If you are looking for a more budget friendly alternative, you can make your own for as little as $2 (enough to fill the closet shown above) if you have a hot glue gun.
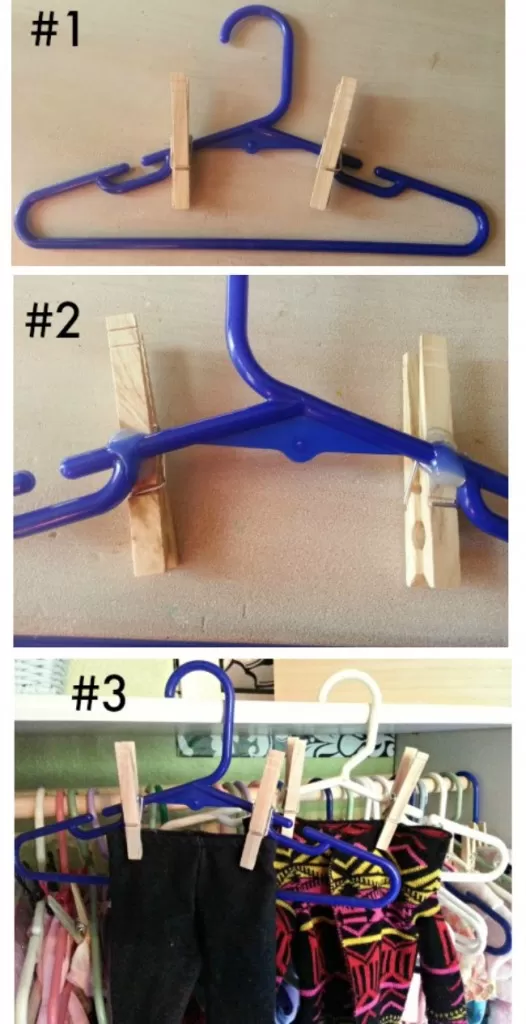
These are so simple, and really affordable to make if you have a hot glue gun. Grab one of your kid size hangers, and add a dab of hot glue onto one side of your first wooden clothes pin. Place it approximately 2 inches in from the center of the hanger and hold it for a few seconds until the glue starts to dry and its secure. Do the same thing with a second clothes pin on the opposite side of the hanger. Now, to secure them better (since little hands would be tugging on them) I flipped the hangers over and added a bead of hot glue on the back, so that the hot glue went all the way around the hanger (see image #2 above). Let the hot glue dry fully.
Once the hot glue is dry, you simply attach the doll clothes with the clothes pins (like in picture #3).
How to put your doll closet together:
This part is so simple once you have your space planned out and supplies ready:
#1 Measure the length of your shelf and cut your wooden dowel to that size
#2 Screw or nail your dowel into your shelf walls (screwing it in will create a more secure connection, but its also easier to split the dowel).
#3 Start hanging your doll clothes, and organize your Canvas bin with the items that don’t hang up. I purchased two plastic organizers in the bathroom section of my dollar store (see photo above) to organize the shoes in and it worked perfectly!
My kids have started to play with their dolls much more since we put the closet in. Clothes that used to sit in a basket, are exciting to the kids again. They get the dolls dressed for the day, and get them in their PJs at night. It was not much effort, but resulted more fun for the kids!
If you are really handy with woodworking, Ana White has these plans to build an actual American Girl Doll Closet here too.
Other articles you might be interested in:
- DIY American Girl Doll Shoes & Sandals – no sewing required
- DIY Duct Tape Shoes for American Girl Dolls
- How to save on American Girl Doll Clothes and Accessories
- How to make a doll house with bookshelves
- How to make a dollhouse out of a Soda box (perfect for Road Trips)
- DIY Playhouse Bed – Room Makeover (you can see the original version of the closet we used to make the doll closet in this post)


Thank you so much for sharing all these great tips and ideas with Share It One More Time. Cathy
Found you on Wow Me Wednesday and had to visit! With three nieces this will come in handy. :) Thanks for sharing
Thank you so much for joining us on #PureBlogLove Link Party! I love this idea!!!
This looks so good! You did an incredible job. Pinned. We had so much fun partying with you at our last party. We hope to see you tonight’s party at 7 pm. We love to see what you have been working on! https://loulougirls.blogspot.com/
Happy Monday! Lou Lou Girls