DIY Duct Tape American Girl Doll Shoes! How To Make Doll Shoes For 18″ Dolls
This post may contain affiliate links and I may be compensated for this post. Please read our disclosure policy here.

Duct Tape Shoes for American Girl Dolls – How To Make Doll Shoes For 18″ Dolls
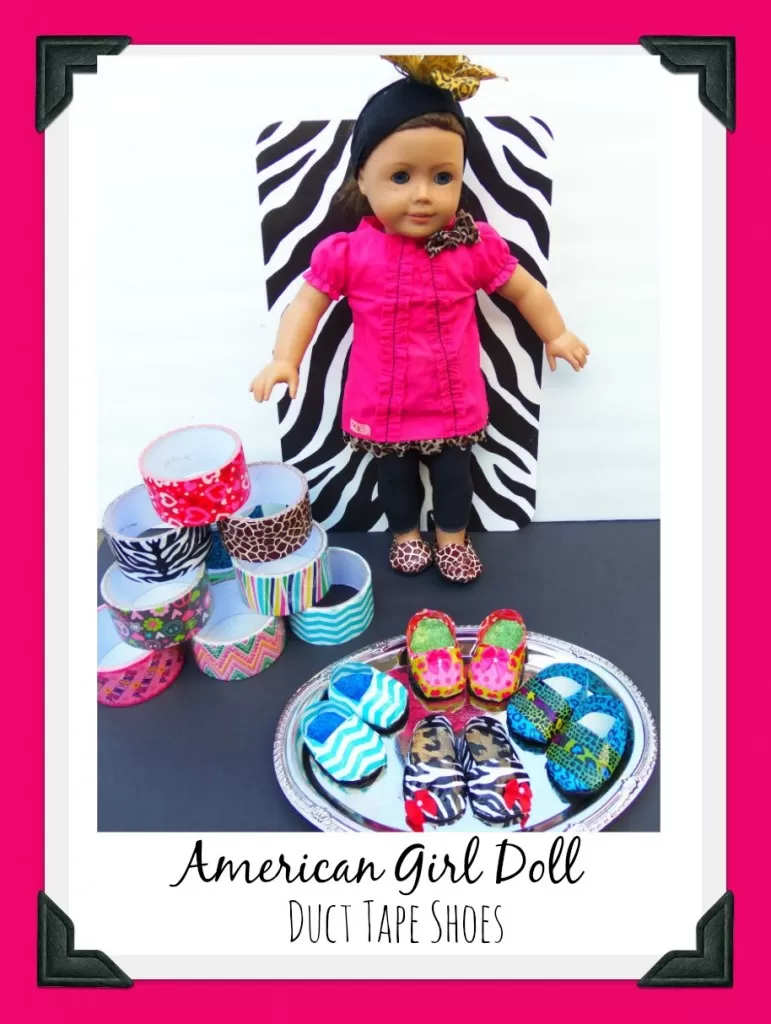
Looking for ideas on how to make American Girl Doll Shoes, with no sewing involved? My kids love to accessorize their dolls, but sewing projects can get complicated. I do light sewing, but not much in general, and I wanted to make shoes the kids could help design (and make too if they want), so we made duct tape shoes for their 18″ dolls the other day, and will show you how we did that here.
Once you get the concept down, each pair can take less then 5 minutes to make (for adults – it takes the kids longer), and duct tape is a pretty affordable material (considering one roll will make multiple pairs). I found all of the rolls shown in the photo above at my local Dollar Store, for just $1 a roll!
One idea to save on materials is to invite a few friends over, and have everyone bring one roll of their favorite duct tape. That way you each only have to buy one roll, but can make multiple pairs of shoes with different designs!
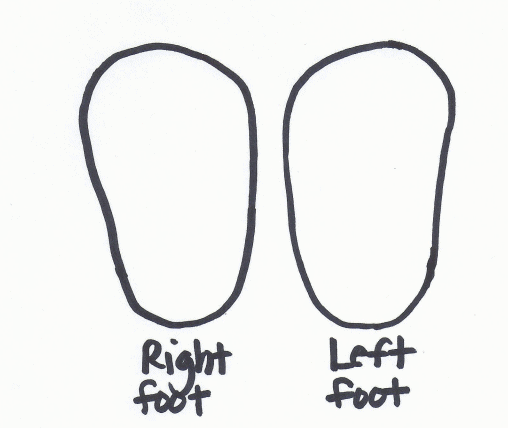
We also have a FREE pattern you can use to make American Girl Doll Shoes, or Doll Shoes For 18″ Dolls here you can print and cut from home.
Materials needed to make Duct Tape Shoes for American Girl Dolls:
- Duct Tape (it comes in so many fun designs now days)
- Material for the Sole of the Shoe (we used sticky felt, I paid $1 per sheet at craft store, so this is a much better deal if you will use more) but you can also use foam, cork, etc.
- Hot Glue Gun & Glue (to secure the sole). You could also use a tacky craft glue if you prefer.
- Foil
- Doll that you want to make the shoes for (for fittings)
- Free American Girl Shoe Pattern Printable (or one of your dolls shoes that you can trace)
How to Make No Sew Duct Tape Shoes for American Girl Dolls:
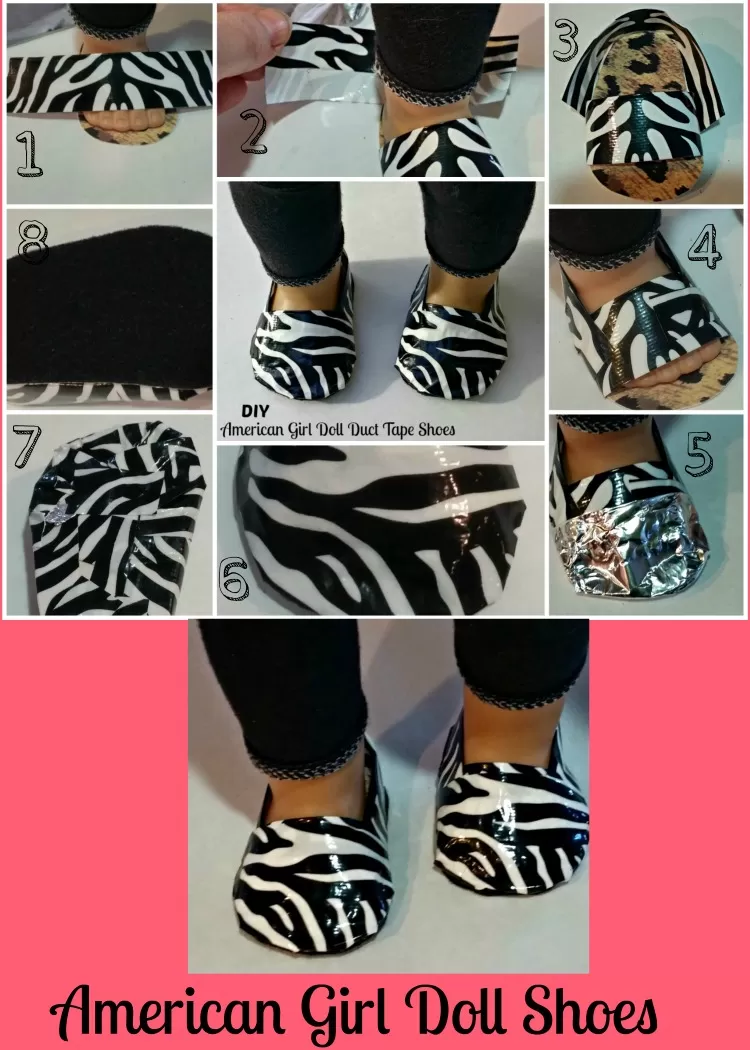
#1 – Start by cutting out your shoe base (you can use this pattern, or trace an american girl doll shoe you already have). You can use craft foam, cork, or cardboard for your base. We got a $1 placemat from the dollar store, in flexible plastic material, which is what we used.
Once your base is cut, stand your american girl doll on it to figure out how long you need that first strap that goes across the top to be. We used a 3 1/2 inch strips. You can use a string to measure. Wrap it over the top, and leave a few centimeters on each side so that you will be able to wrap it under the bottom of the shoe.
To make the strap that goes across the top of the shoe, simply cut a piece of duct tape the length you measured, and fold it in half. Wrap it around the top of the doll foot, to figure out how much room you need for the doll foot to fit, and then secure it to the bottom of the sole with a small piece of duct tape on each side.
#2 – To make the back of your shoe, you will use a similar method. Take your string and measure how long you will need a strip of duct tape, so that it will go from the middle of the strap all the way around the back of the shoe. For us, it ended up being about the same size as the strap piece.
For the back strip, fold the tape over 1/3 of the way, so half of the tape is left exposed (you will use this to tape it to the shoe sole).
#3 – Next, wrap that strap carefully around the back of the shoe so that the sticky part of the tape sits below the sole. You can then slowly fold the sticky part of the tape under the sole to attach.
#4 – Now you can use a small piece of the duct tape to secure the back strip to the front strip on each side.
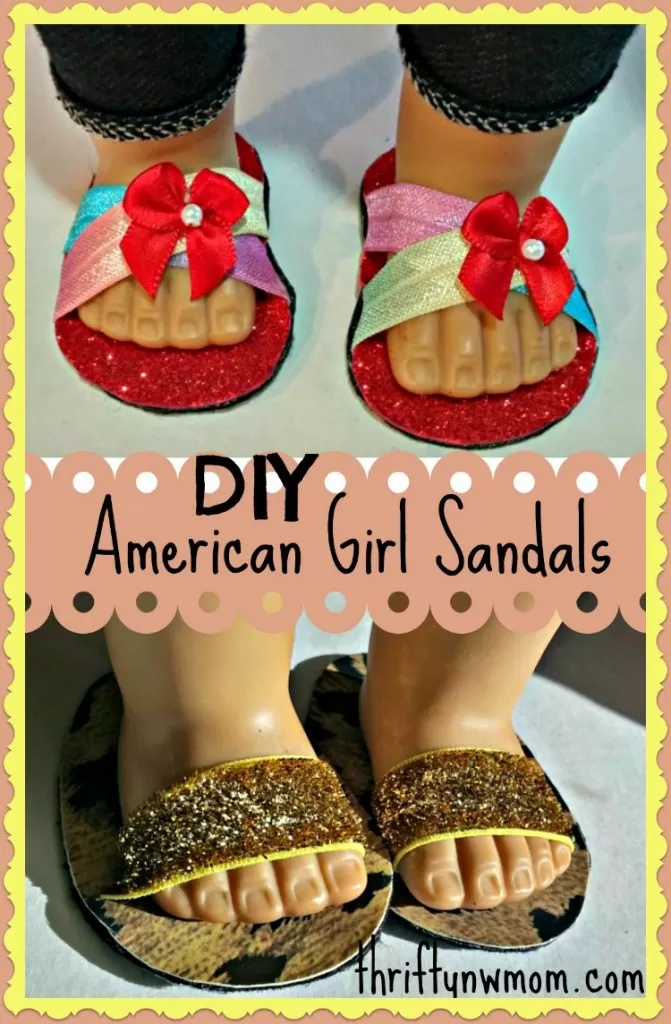
At this point, you could use the shoe as a sandal by jumping down to step 8 if you want to.
#5 – To turn it into a full shoe, put the dolls foot back into the shoe. Use a small piece of foil to wrap around the toe of the shoe, to create a form for what your shoe should look like.
Carefully remove the dolls foot at this point, and keep the foil form in place.
#6 – Cut a piece of duct tape long enough to cover the top of the shoe, with room to fold over to the bottom of the shoe on both sides.
Cover the foil with the duct tape (overlapping it some, so no foil peaks through at all). Wrap it around the bottom of the shoe, and attach it to the sole. Take your time on this step, as it can be a little tricky to wrap it around the curve of the front of the shoe.
#7 – Use small pieces of duct tape secure the wrapped duct tape to the bottom of the sole. Make sure everything is nice and secure on the bottom at this stage.
#8 – Attach a finished sole to the bottom of your shoe, to complete the shoe. For this step you can use sticky felt, or hot glue on a second piece of foam or cork. Simply cut it out of the same pattern you used for the shoe sole.
This would also make a fun gift idea for a child you know who has an 18″ doll. Grab a box and add in the materials we have mentioned above. Print out directions, and let her know you have given them a craft box to make doll shoes!


5 Comments